什么都不说了直接复制粘贴吧。 大佬原本是用的CNFaster的机器,我用的是Hetzner的机器+储存卷。大致的步骤都是差不多的,只不过有小部分有问题,通过gpt(真的是一个好东西)解决了,下面进入正题(部分图片直接偷盗)。 所以这篇教程旨在通过重装**将系统盘转换成lvm管理,并且将数据盘和系统盘合二为一**,直接搓成一个完整的大盘。

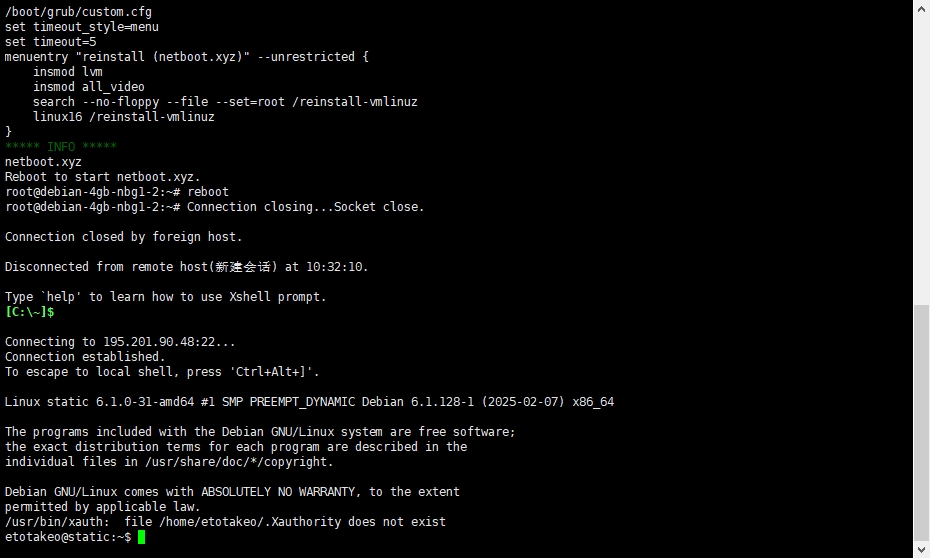
使用一键重装脚本,并重启到 netboot.xyz(可使用商家后台 VNC 手动安装)

curl -O https://raw.githubusercontent.com/bin456789/reinstall/main/reinstall.sh || wget -O reinstall.sh $_
bash reinstall.sh netboot.xyz
reboot

这个是我的


重启后,从Hetzner后台进入vnc

  • 进入 netboot.xyz

    输入后台提供的网络IP 子网掩码

    网关(事实证明Hetzner不需要自己手动设置ip这些)

    选择网络安装

    选择系统和版本(debian12)


    进入图形化安装界面

    设置语言,一路默认

    (我喜欢用中文,所以我选择了中文,键盘布局选择美国英语就行了)

    手动设置网络

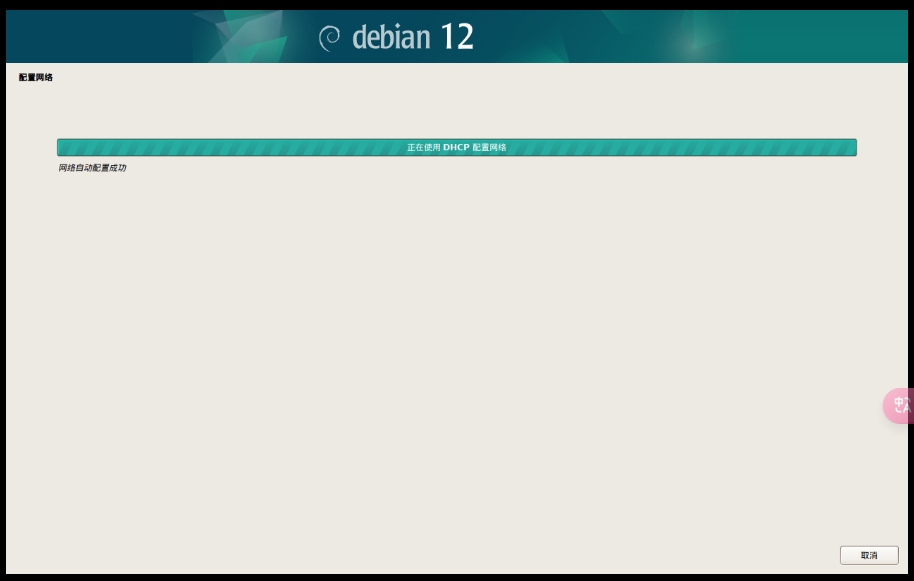
    填入后台提供的IP地址掩码网关,DNS我用了8.8.8.8(Hetzner不需要,自动通过HDCP完成配置)

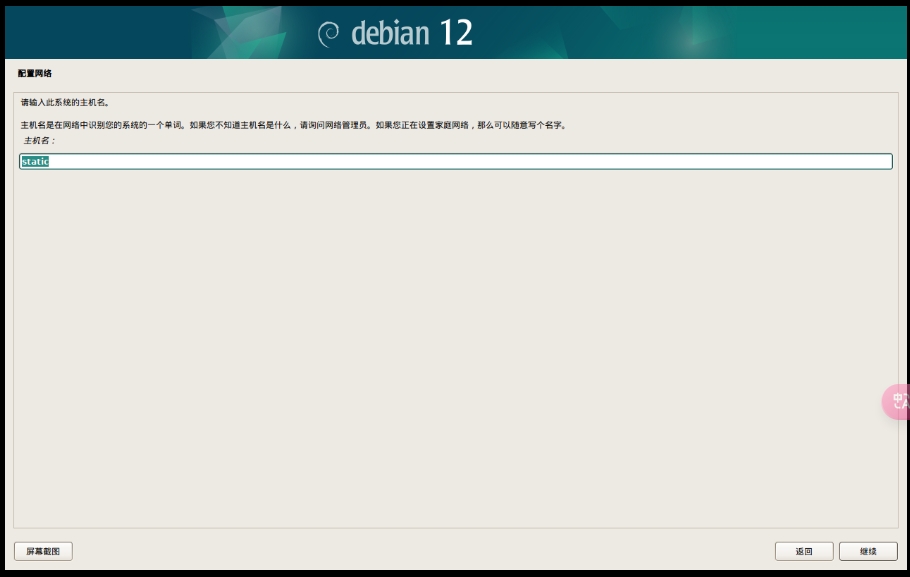
    这里的主机名可以随便


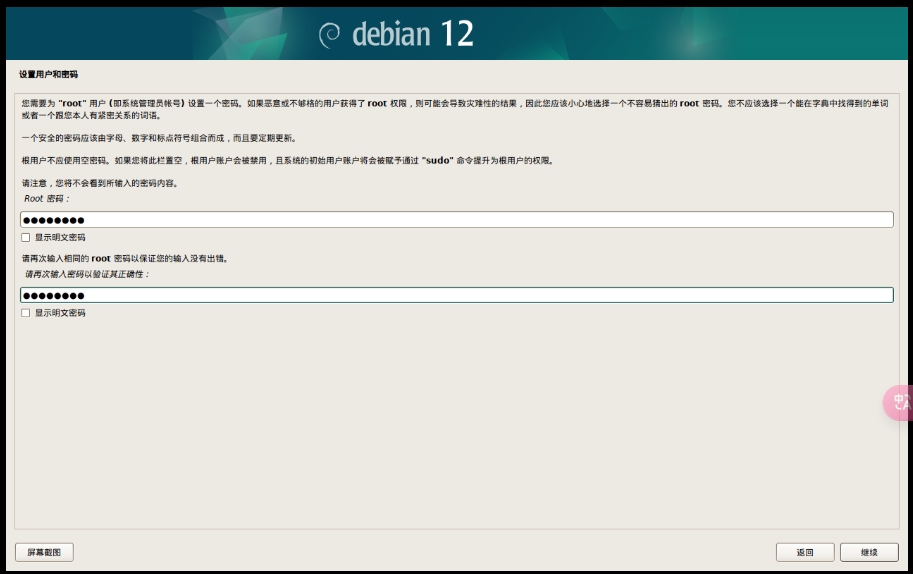
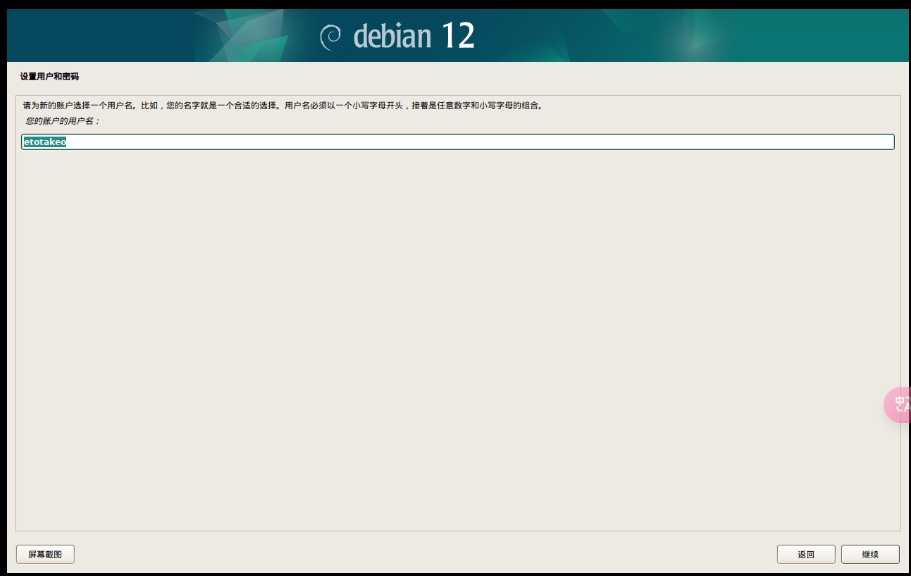
    设置root和新建账户密码


    这里会重新新建一个账户,这个是一会儿安装完毕之后登录的账户,之后在切换到root账户去

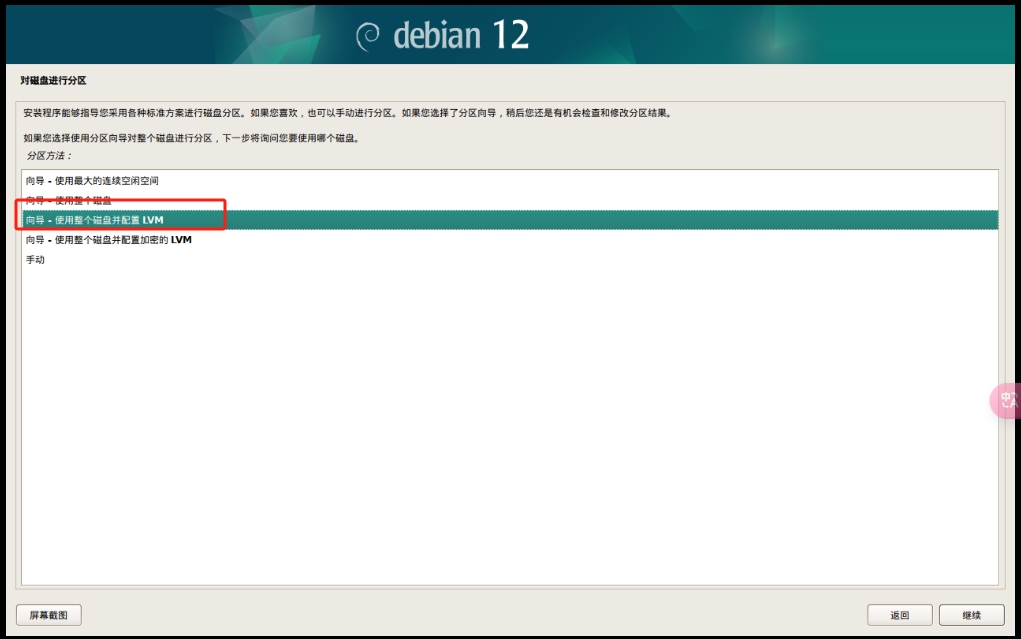
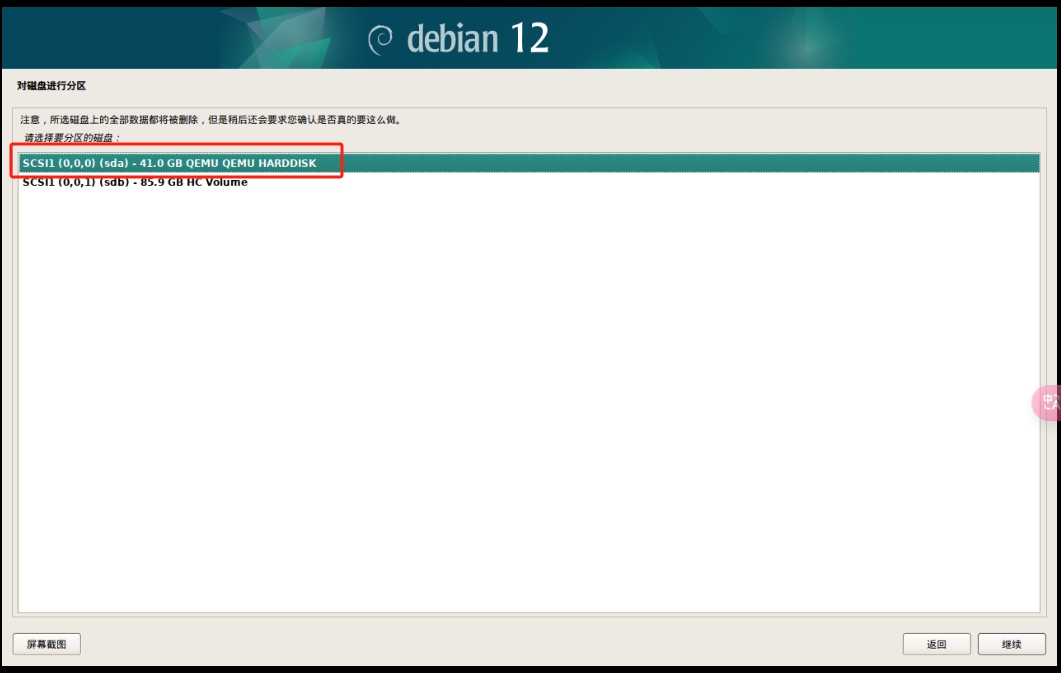
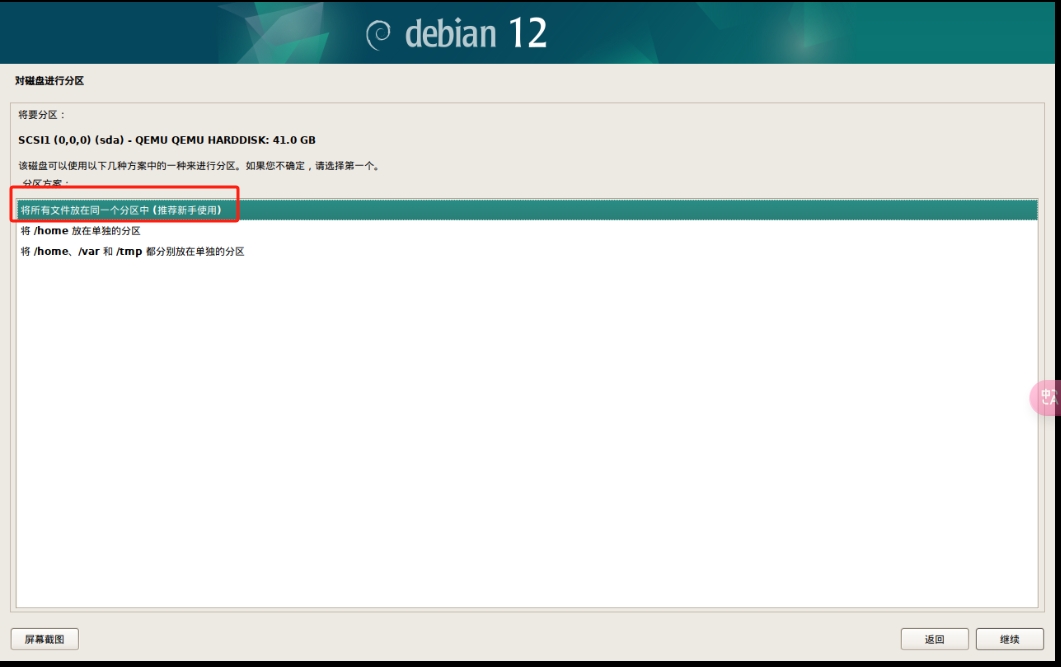
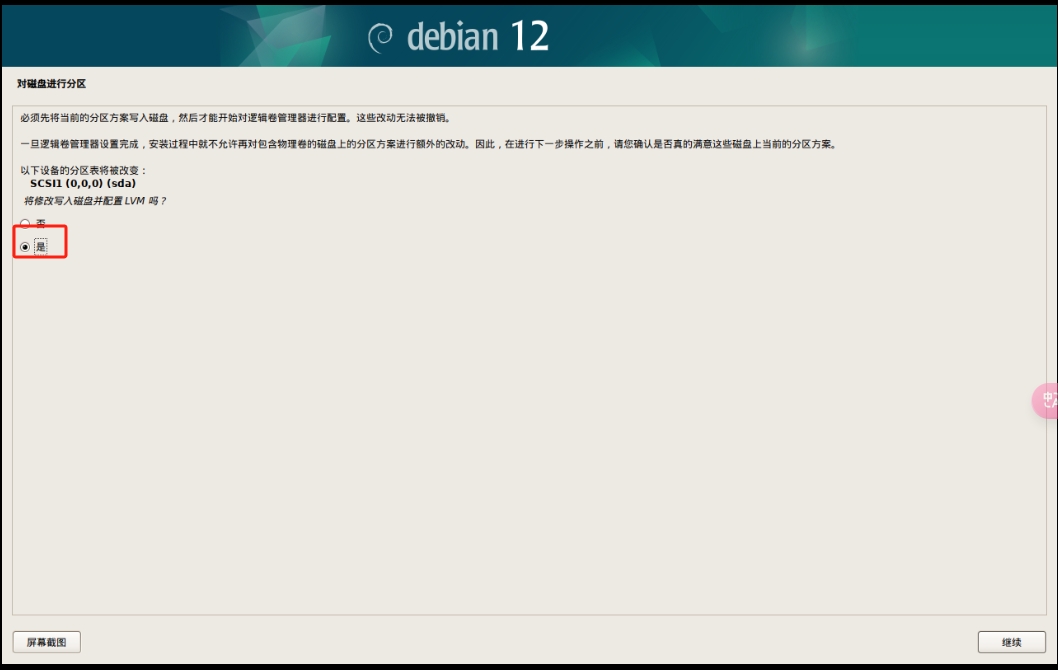
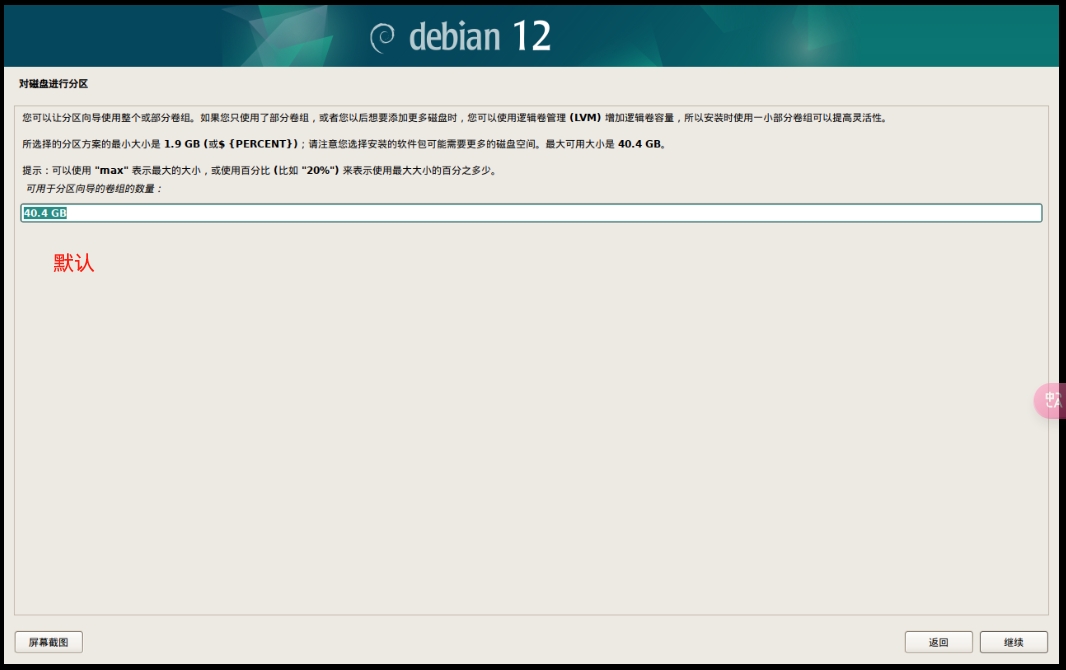
    **选择设置lvm管理硬盘** **(重要)**


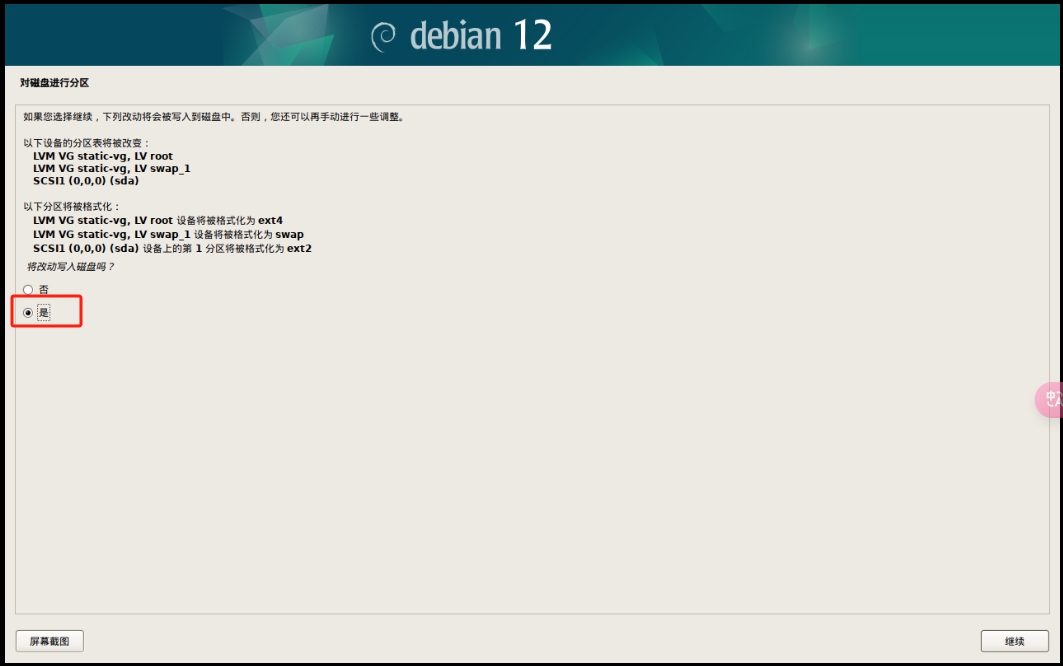
    写入更改


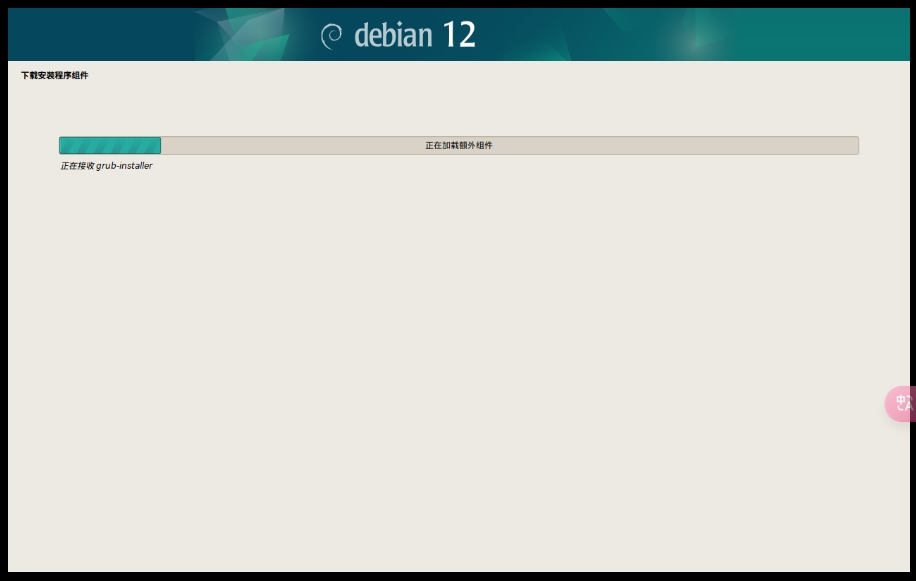
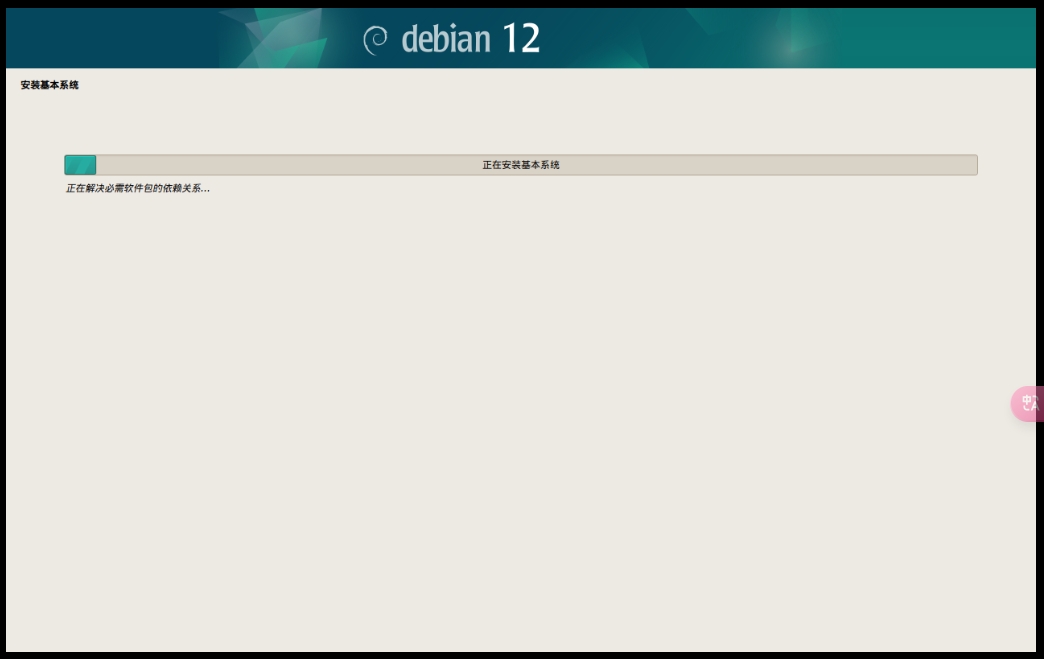
    开始安装系统

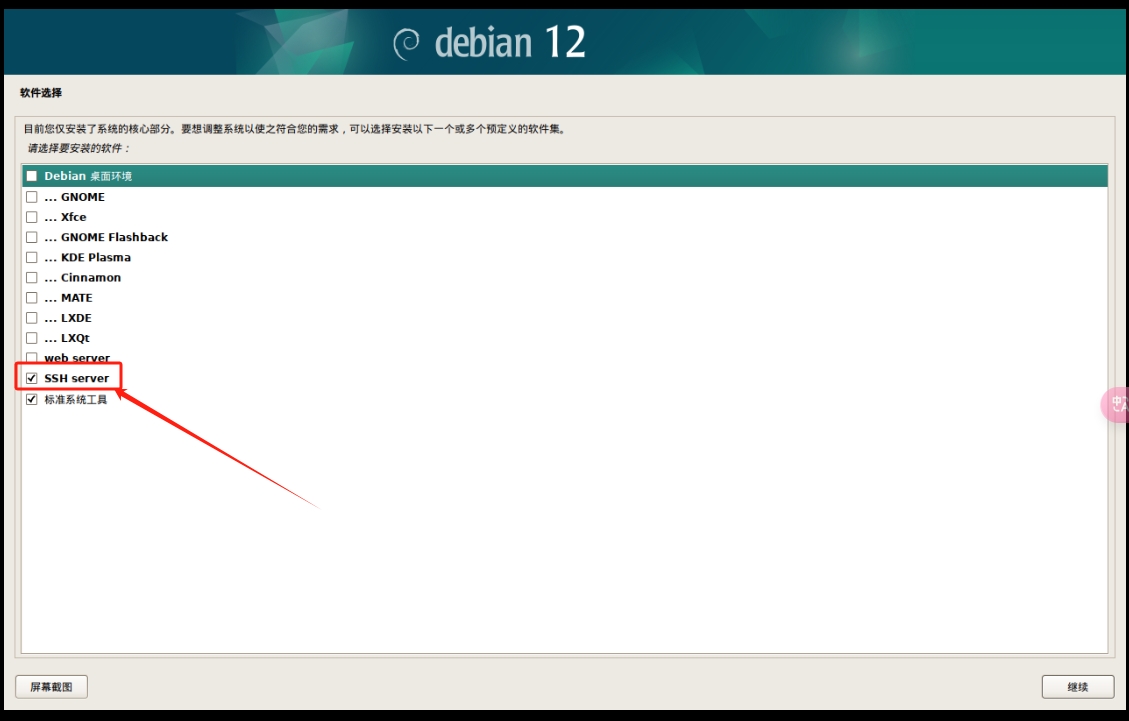
  • 仅安装系统必要和ssh server

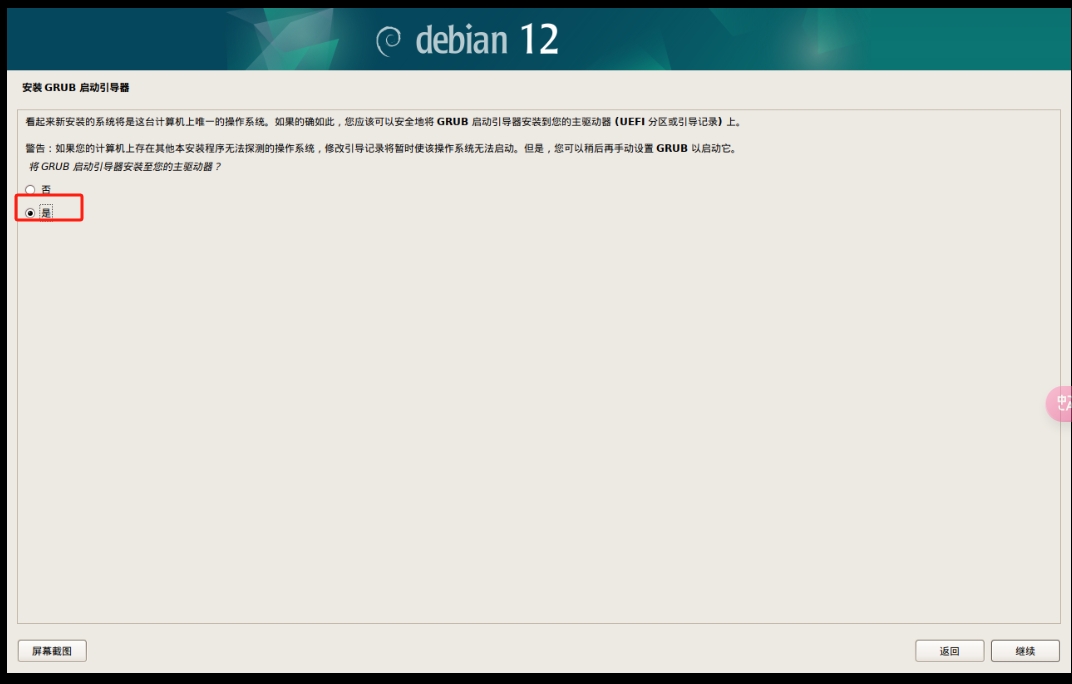
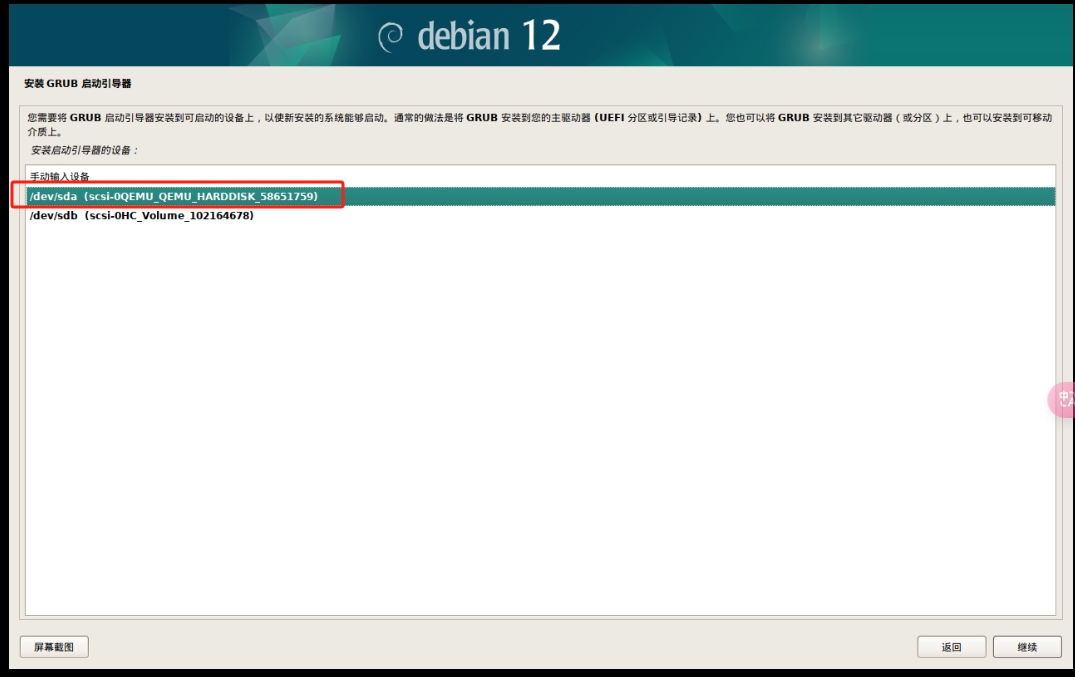
**设置grub**(**重要**)


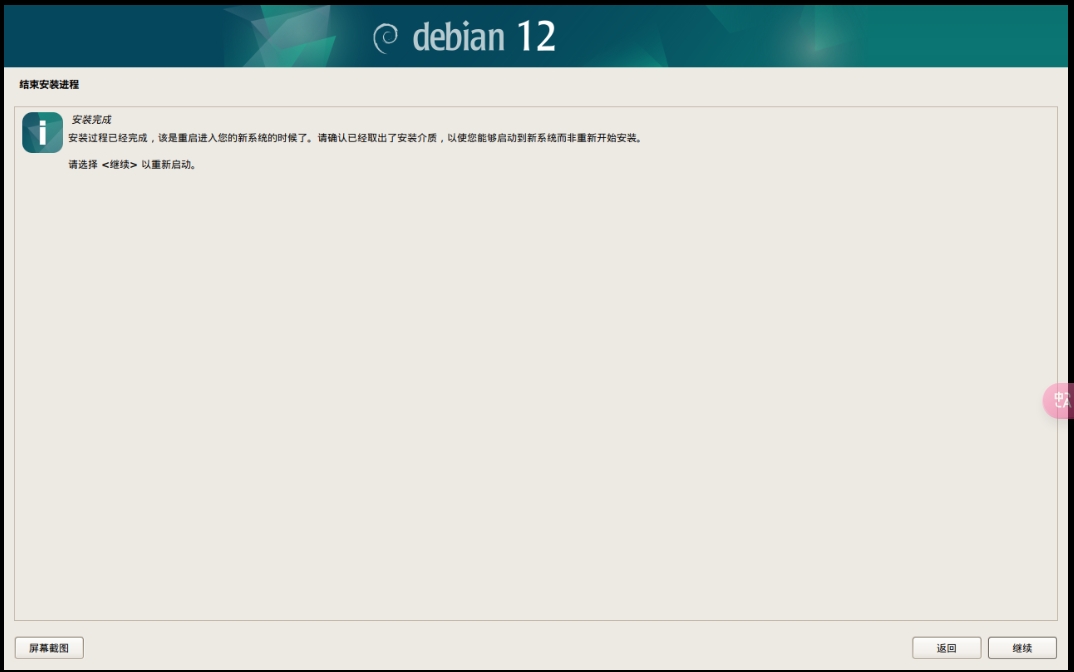
引导安装完成,重启

**注意**:默认只支持用户账户登陆,所以用用户账户登陆后开启root ssh登陆

su

echo 'PermitRootLogin yes' >> /etc/ssh/sshd_config
systemctl restart ssh

开始扩容啦

然后使用exit断开连接,重新连接使用root用户登录

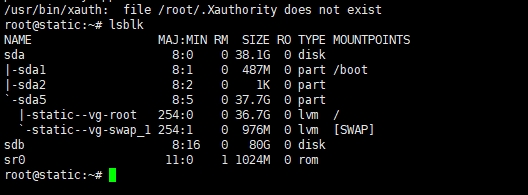
查看分区表

lsblk


显示sdb下面没有sdb1则继续,如果有sdb1则直接跳到“刷新分区”
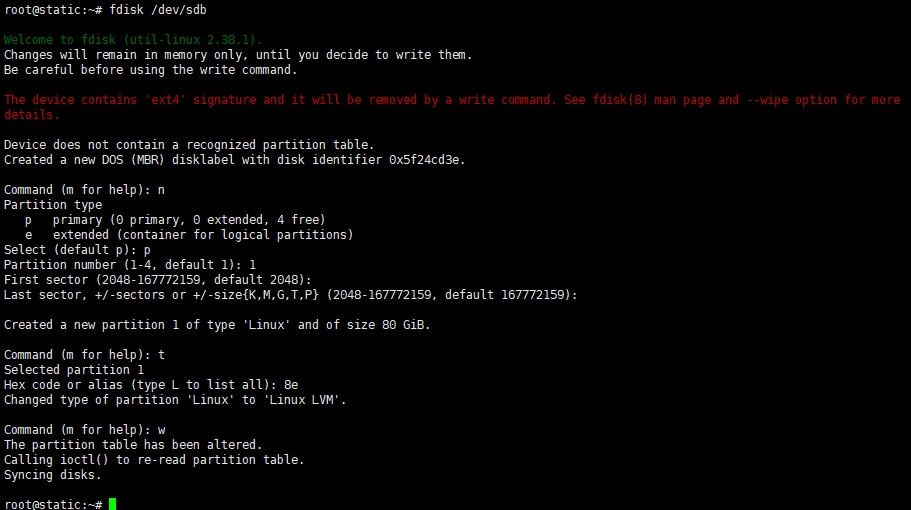
运行 fdisk /dev/sdbparted /dev/sdb`来创建一个新的分区:

这时会提示红色的

不用管直接继续
fdisk 命令提示符下,按照以下步骤执行:

- n(新建分区)

  • 选择 p(主分区)
  • 1(分区号 1)
  • 直接回车(使用默认起始扇区)
  • 直接回车(使用整个磁盘)
  • t(修改分区类型)
  • 输入 8e(设置为 Linux LVM)
  • w(写入并退出)


安装parted用来刷新分区表

apt-get update
apt-get install parted -y

**刷新分区表**

有时候系统不会立即识别新分区,所以执行:

partprobe /dev/sdb

**检查分区**

确保 <code>/dev/sdb1</code> 存在:

lsblk /dev/sdb


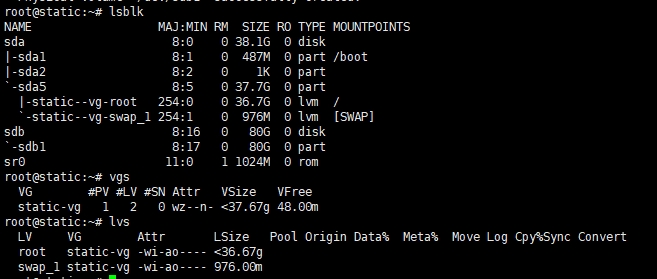
然后运行,接下来的步骤要根据这里反馈的内容操作

lsblk
vgs
lvs

创建物理卷

pvcreate /dev/sdb1

扩展volume

vgextend static-vg /dev/sdb1

拓展所有剩余空间至逻辑卷

lvextend -l +100%FREE /dev/static-vg/root

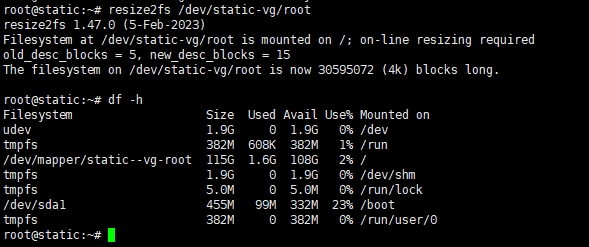
resize卷,并查看是否添加成功

resize2fs /dev/static-vg/root
df -h

前言

请输入图片描述

Debian系统简单安装qbittorrent-nox

qbittorrent因其高效的上传速率而深得广大PT玩家的喜爱,小白个人认为最简单的使用方法是直接docker-compose运行,正好最近有docker用不溜的老哥问能不能直接安装,当然可以,今天我来看看Debian系统如何安装qbittorrent-nox。

apt安装qbittorrent-nox

apt update -y
apt install qbittorrent-nox -y

配置qbittorrent-nox进程守护

作为小白,这里我们粗暴的使用root用户运行,大佬勿喷……

复制以下代码块的全部内容并一次性粘贴至 SSH 窗口:

cat << EOF > /etc/systemd/system/qbittorrent-nox.service
[Unit]
Description=qBittorrent Command Line Client
After=network.target

[Service]
Type=forking
User=root
ExecStart=/usr/bin/qbittorrent-nox -d --webui-port=8080
ExecStop=/usr/bin/kill -w qbittorrent-nox
Restart=on-failure

[Install]
WantedBy=multi-user.target
EOF

此处8080端口自定义即可。然后:

更新配置
systemctl daemon-reload
启动服务
systemctl start qbittorrent-nox
开机自启
systemctl enable qbittorrent-nox
查看状态
systemctl status qbittorrent-nox

至此,在浏览器中输入服务器的IP和qbittorrent-nox的端口就可以进入了,用户名是admin,用户密码:adminadmin。强烈建议进去之后,立马修改用户名和用户密码。

后续

用户问题

刚刚我们说了,小白直接粗暴地使用root用户,但是安全意识强的老哥肯定不会这样,而是使用相关用户来运行qb,这里就又设计的用户和用户组权限的问题了,我们大概看下吧:

  1. 添加专属的qbittorrent-nox用户组

    adduser --system --group qbittorrent-nox # Debian 11及旧版本
    adduser --home /home/qbittorrent-nox --system --group qbittorrent-nox # Debian 12新版本
  2. 将当前用户添加进qbittorrent-nox用户组中,注意: “your-username”是你当前用户的名字,比如root账户就是root,ubuntu账户就是ubuntu,可以通过命令whoami获取。

    adduser your-username qbittorrent-nox
  3. 与之相对应的进程守护文件也要稍微修改下:

    cat << EOF > /etc/systemd/system/qbittorrent-nox.service
    [Unit]
    Description=qBittorrent Command Line Client
    After=network.target
    
    [Service]
    Type=forking
    User=qbittorrent-nox 
    Group=qbittorrent-nox
    ExecStart=/usr/bin/qbittorrent-nox -d --webui-port=8080
    ExecStop=/usr/bin/kill -w qbittorrent-nox
    Restart=on-failure
    
    [Install]
    WantedBy=multi-user.target
    EOF

qbittorrent-nox-static

apt源的qb版本不是最新的,我们也可以通过开源项目qbittorrent-nox-static来安装新版的qb,项目地址如下:https://github.com/userdocs/qbittorrent-nox-static’]qbittorrent-nox-static

  1. 下载:

我们可前往项目主页下载最新版本,最新版本为qbittorrent 4.6.2 libtorrent 2.0.9,我们直接下载:

# 下载qbittorrent-nox二进制文件,并放到/usr/local/bin目录下面
wget -qO /usr/local/bin/qbittorrent-nox https://github.com/userdocs/qbittorrent-nox-static/releases/download/release-4.6.2_v2.0.9/$(uname -m)-qbittorrent-nox
# 二进制文件700权限
chmod 700 /usr/local/bin/qbittorrent-nox
  1. 添加进程守护:
cat << EOF > /etc/systemd/system/qbittorrent-nox.service
[Unit]
Description=qBittorrent Command Line Client
After=network.target
[Service]
Type=forking
User=root
ExecStart=/usr/local/bin/qbittorrent-nox -d --webui-port=8080
ExecStop=/usr/bin/kill -w qbittorrent-nox
Restart=on-failure
[Install]
WantedBy=multi-user.target
EOF

感谢蝈蝈大佬开发的 mtk_uartboot 工具,这样就可以随便刷砖了
适用系列:MediaTek MT7622、MT7981、MT7986、MT7988 SoC

1.下载工具

地址:https://github.com/981213/mtk_uartboot/releases
Windows 用户选择 mtk_uartboot-x86_64-pc-windows-msvc.zip
Linux 用户选择 mtk_uartboot-x86_64-unknown-linux-gnu.tar.gz

手动编译(Linux)

不打算自己构建工具请忽略此节
首先自行安装 rust 编译环境,我这里用的是 ubuntu

sudo apt install aptitudesudo aptitude install rust-all

开始构建(以在 x86 上运行为例):

git clone https://github.com/981213/mtk_uartboot && cd mtk_uartbootcargo build --verbose --locked --release --target x86_64-unknown-linux-gnu

目标文件:target/x86_64-unknown-linux-gnu/release/mtk_uartboot

2. 编译 ATF (RAM Boot)

不打算自己编译 bl2 请忽略此节

手动编译(Linux)

git clone -b mtksoc --single-branch https://github.com/mtk-openwrt/arm-trusted-firmware
cd arm-trusted-firmware

开启RAM Boot需要打个小补丁:

--- a/plat/mediatek/apsoc_common/bl2/Config-uart_dl.in
+++ b/plat/mediatek/apsoc_common/bl2/Config-uart_dl.in
@@ -10,7 +10,7 @@ config _RAM_BOOT_RAM_BOOT_UART_DL     bool "Enable RAM boot UART download support"
     depends on _BOOT_DEVICE_RAM     depends on !_RAM_BOOT_DEBUGGER_HOOK
-    depends on _INTERNAL
+    # depends on _INTERNAL
     default n  # Makefile options

然后就可以选择构建目标了(以MT7981 DDR3内存为例):

Advanced boot device configuration里面
选中Enable RAM boot UART download support

注意:MT7981B需要在Advanced DRAM configurations里面选择
内存封装为BGA,默认是QFN,不改此项刷入 bl2 必砖

开始构建:make CROSS_COMPILE=aarch64-linux-gnu-
目标文件:build/mt7981/release/bl2.bin

3.开始救砖

我这里提供一份预先构建的 bl2:https://www.lanzouw.com/ioTYu1pvi23g
涵盖 MT7622、MT7981、MT7986 DDR3/4MT7988 没试过,不知道
MT7981 DDR3内存为例开始救砖:

Linux 上:

注意:此时不能有其它程序访问/dev/ttyUSB0
其中fip.bin为某个机子的 uboot,/dev/ttyUSB0为连接至路由器 UART 的串口

sudo ./mtk_uartboot -s /dev/ttyUSB0 -p mt7981/mt7981-ddr3-bl2.bin -a -f fip.bin --brom-load-baudrate 921600 --bl2-load-baudrate 1500000

如果你的串口承受不了 1500000 的波特率,那么请将--brom-load-baudrate--bl2-load-baudrate设置成 115200

sudo ./mtk_uartboot -s /dev/ttyUSB0 -p mt7981/mt7981-ddr3-bl2.bin -a -f fip.bin --brom-load-baudrate 115200 --bl2-load-baudrate 115200


打印Received FIP后使用串口工具访问串口,此时会打印Hit any key to stop autoboot
操作上下键分别选择Upgrade ATF BL2Upgrade ATF FIP即可完成救砖

Windows 上:

注意:此时不能有其它程序访问COM4
其中fip.bin为某个机子的 uboot,COM4为连接至路由器 UART 的串口

.\mtk_uartboot.exe -s COM4 -p .\mt7981\mt7981-ddr3-bl2.bin -a -f fip.bin --brom-load-baudrate 921600 --bl2-load-baudrate 1500000

如果你的串口承受不了 1500000 的波特率,那么请将--brom-load-baudrate--bl2-load-baudrate设置成 115200

.\mtk_uartboot.exe -s COM4 -p .\mt7981\mt7981-ddr3-bl2.bin -a -f fip.bin --brom-load-baudrate 115200 --bl2-load-baudrate 115200

打印Received FIP后使用串口工具访问串口,操作上下键进入Boot Menu完成救砖

转载至:暗云

Docker-compose的官方库

首先安装docker

一键安装docker

curl -fsSL https://get.docker.com | bash -s docker

安装docker-compose


sudo curl -L "https://github.com/docker/compose/releases/download/v2.29.7/docker-compose-$(uname -s)-$(uname -m)" -o /usr/local/bin/docker-compose
sudo chmod +x /usr/local/bin/docker-compose

安装完成后,你可以通过运行以下命令来验证安装是否成功:

docker-compose --version

然后就可以愉快的使用docker-compose了

在Linux上挂载WebDAV,您可以使用davfs2工具来实现。以下是具体的步骤:

安装davfs2工具:
在终端中运行以下命令来安装davfs2工具:

sudo apt-get install davfs2

配置davfs2:
在终端中运行以下命令来编辑davfs2的配置文件:

sudo nano /etc/davfs2/davfs2.conf

确保配置文件中有以下配置项并取消注释:

# Uncomment the following line if you want to enable caching
use_locks       0

创建本地挂载点:
在终端中运行以下命令来创建一个本地挂载点:

sudo mkdir /mnt/webdav

挂载WebDAV:
在终端中运行以下命令来挂载WebDAV:

sudo mount -t davfs http://webdav_server_address /mnt/webdav

在执行以上命令时,将http://webdav_server_address替换为您要连接的WebDAV服务器的地址。

输入用户名和密码:
当提示输入用户名和密码时,请输入您的WebDAV服务器的用户名和密码。

挂载成功后,您可以通过/mnt/webdav目录来访问和管理WebDAV服务器上的文件。如果您想要卸载WebDAV,可以使用以下命令:

sudo umount /mnt/webdav

转载至:亿速云